I’ve always been intrigued by the Raspberry Pi boards…they are small, super cheap and runs Linux distros well. In 2012 I bought my first one and have since bought the newer models 2 & 3 too. Back then I ran Linux on it and tried out a few Python scripts to read temperatures for my brewery. The DS18B20 probes were too small and used 1-wire configurations, which isn’t too great, and eventually abandoned the project.
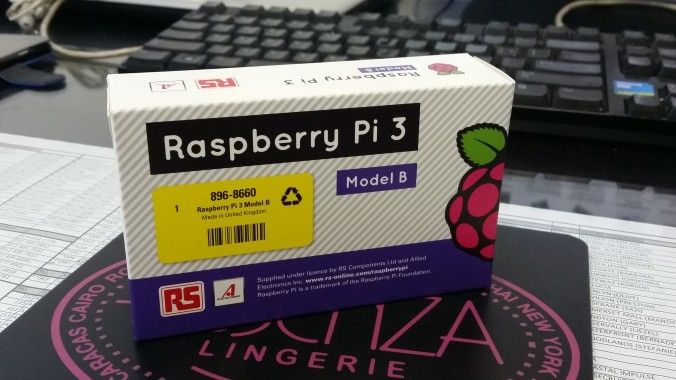
With the Raspberry Pi 3 things got a little more advanced…much faster, Bluetooth and wireless built-in….then Microsoft was nice enough to release a slimmed down (ARM and x86/x64 devices) version of Windows 10, called Windows 10 IOT core.
Sooooo, I downloaded, installed and played around and immediately knew it was time to attempt another brewery controller. 🙂
The new IoT core comes with loads of examples on Github…all you need to do is install Visual Studio (free) and ur good to go. I played around for a while, just to get into the whole world of C# programming. I ran a few courses on Visual basic back in a day, so it’s not like I don’t know anything. The samples are well documented too, and following c# code seemed easy to understand. So, I started planning my brewery setup. Again, reading up a lot about how theelectricbrewery.com does things, since my whole brewery is kinda based on their design. The temperature probes they use are PT100’s, controlled by PID’s, and is exactly the function I need to replace with my Raspberry. I ordered some MAX31865 boards from Hallard.me (https://hallard.me/max31865/).
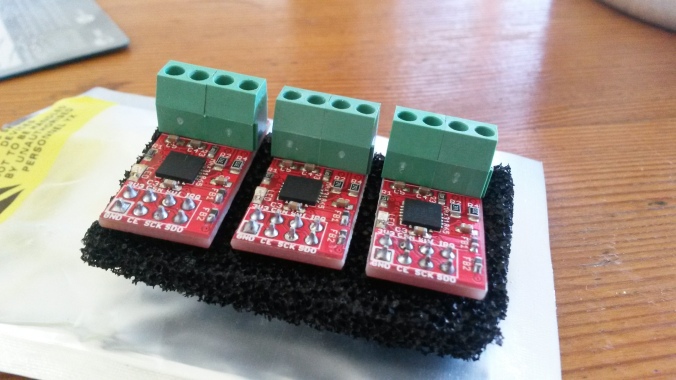
The boards came with Arduino libraries and was pretty easy to get it to work (on Arduino), but I needed it to work on my RPi. I was hoping to convert the libraries to c#, but was unsuccessful. I searched the internet high and low for answers and help. Months passed…Eventually, I sold the boards and got the MAX31855 boards instead. They have some already working c# classes available online…once I got the boards I was able to get some readings from the probes into a terminal output screen in Visual Studio debugging. Then came the challenge of getting 3 different readings from the Pi. The max31855 boards use an SPI connection and turns out the Raspberry pi only have room for 2 x devices on its SPI bus. (only 2 x chip select lines) After quite a bit of research, I found out that it’s possible to share a chip select lines, and with these few lines of code it was working.
private const Int32 SPI_CHIP_SELECT_LINE = 0;
private const string SPI_CONTROLLER_NAME = "SPI0";
private const Int32 SPI_CHIP_SELECT_LINE3 = 1;
private const string SPI_CONTROLLER_NAME3 = "SPI0";
private const Int32 SPI_CHIP_SELECT_LINE2 = 0;
private const string SPI_CONTROLLER_NAME2 = "SPI1";
With all 3 x of my temperatures reading on the RPi, all I now had to do is program the relay switches (easy-peasy) and make the app look nice (the fun part).
In the meantime, I found a place in Paarden Eiland called Cape Instrument Services that makes up custom temperature probes. I ordered 3 x for around R300 each. They worked perfectly and came with a 3-meter lead.

The interface is pretty straight forward…I simply slapped a background on and made a few buttons to control the relay switches. The slider is used to set a temperature, and the idea is to switch the elements either on or off, depending on the reading from the probe. I also created some text blocks for entering the trigger temperatures, as well as some element override buttons and pump switches.
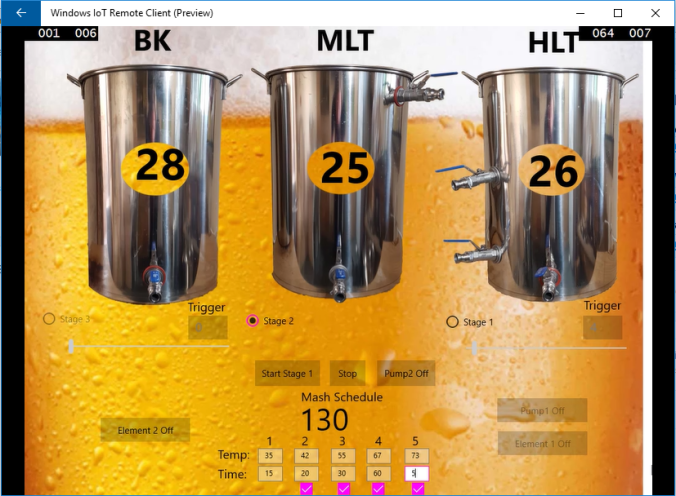
At the time of writing this, I removed the mash schedules…the idea was to be able to enter a mash schedules and times, depending on your recipe, and have the Pi calculate the total time, and once started, automatically raise the temperature according to what was entered. BUT, the raspberry doesn’t have a CMOS and therefore have no idea of time. Apparently there is a fix, but for now, its been almost a year and I need to get some beer brewing 🙂
In my next post, I’ll show how it all comes together 🙂

Using multiple SPI devices on RPI has always been a mess for me because CE0 CE1 are not always released has they should.
I solved all my issues using custom GPIO to assert CS lines of SPI devices manually in the driver.
that’s what I’m doing there (just an example) on this hardware
https://github.com/hallard/RPI-Lora-Gateway
LikeLike
Thanks the input Charles – looks interesting. I will have a proper look when I get a home 🙂
LikeLike